Yesterday we celebrated Valentines day in my Awana class, which is a children's ministry at my church for those of you who dont know. In my class, I have a good group of cheerful and energetic 3 & 4 year old kiddos, who by the way never cease to make me smile. It really is a beautiful thing to see these precious kids give their attention to God's Word and understand His amazing love. You may think these kids are too young to comprehend anything, but they honestly soak in what they hear, and I've observed them practice love through their actions. Its a joy to guide these kiddos in the path towards Christ and witness them grow throughout the months.
So to make the day festive, I put together some goodie bags for each kid in my class. The bags were filled to the rim with a bunch of goodies and surprises. Target had a bunch of sweet and cheap stuff for Heart day, I had to restrain myself from buying too much cause I wanted it all! Anyways I purchased a bag of simple heart lollipops and made them more appealing by dressing those suckers up with bowties and smiles.
These bowtie pops are perfect for kids and are so easy to put together. Just cut out bowtie shapes from colored paper and use a hot glue to stick em in the bottom of each heart. Dont forget to give these pops some eyes and smiles, oh ya and probably a nose. Hope you guys like the idea and try it out for yourselves!
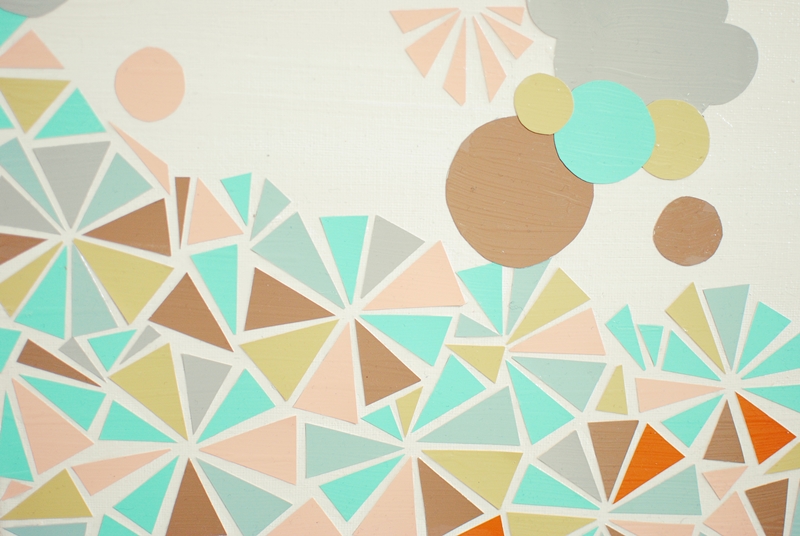
Valentines is just around the corner, so now is the perfect time to craft up some love. Jumping into this project, I really didn't know how I wanted the end results to look like. I started off with the desired to use heart shapes and triangles and went on from there, piecing everything together. Try it out for yourself!
The supplies your gonna need is:
a glossed wood heart (you can purchase it at Micheals or ACMoore. the one i purchased was painted red )
scissors
a few of your paint swatches
modgepodge
paintbrush
yarn
spray paint (its optional)
fabric glue or hot glue gun
Grab all the supplies you need and grab color swatches that you think would look well together, take into consideration what color you want the heart to be, and think of a color motif that works for you.
I wanted to stray away from the typical Valentines day colors and use gold for the heart and a cool color scheme for the triangles. Spray paint both the front and back of your wooden heart.
This is where the fun part comes in, cut out the paint swatches into different size triangles and start arranging them together. To be honest with you, this takes a while to piece these geometric shapes together, its quite the puzzle. Use modge podge to paste the triangles to the heart. Once your composed a desiring piece with your triangles, apply modge podge on top of your design to give it that glossy look.
Once the modge podge has set and dried, grab your fabric glue or hot gun glue and yarn. Use the yarn to spell out the word "love in cursive". To make it easier you can first write it out on the wood and use that as a guideline. Trace the writing with the glue and immediately place the yarn on top of the glue. I personally rather use fabric glue because its strong and tacky. It doesn't dry as fast as hot glue, so you can take your time. The disadvantage using fabric glue is that it takes forever to completely dry (about 8 hours), but when its dry, its really secure. So after finishing the last letter, measure out how long you want the heart to hang. Take the end of the yarn and glue it to the back of the wooden heart. Make sure the glue is completely dry before you hang it up.
Display your piece of art or even give it as a Valentines gift. You can make this piece as personal as you want. Experiment with
different shapes, textures, and you can even use cut out photographs
to add to the heart. Really make it your own!
Well to end this post I want to leave you with a video of The Civil Wars singing
"Tip of My Tongue". I had this video on replay and I typed up this tutorial, such a lovely song. Happy Saturday guys
After finishing a hot cup of morning joe from Starbucks, you eventually toss out the cup along with the coffee sleeve. Well the next time you buy yourself a cup of coffee, you may want to rethink about tossing out that cardboard sleeve.
A few days ago I took a trip to Starbucks to grab an americano, after downing this cup of goodness, I ripped apart the sleeve out of boredom. Immediately I thought the ridges inside of the sleeve would be a perfect stamp, especially since I'm a sucker for lines and patterns. Tried it out and I loved the results the ridges on the sleeve make. So the next time you grab some coffee, save the sleeve and try it out yourself! Its super duper easy and this stamp would be perfect for other paper projects. I put together a simple tutorial for you guys..
Take a coffee sleeve and rip the ends apart and decide on what shape you'd want to cut out.
Once you cut out the shape you desire, glue something on back of the piece to be used as a knob. I used a hot glue gun to glue one of my tiny thread spools on back of the piece, and it worked perfectly.
Place some ink or paint on a plate and gently place your stamp on the ink. You might want to test the stamp on a piece of paper before you stamp it onto the actual paper you want for the pattern.
There ya have it, easy as can be. The results look pretty awesome, especially if you stamp the pattern on top of each other. Hope you have fun with this tutorial!
Since ive been using more candles lately, I thought it would be a neat project to make my own candles for once. I purchased this teacup and saucer at a nearby thrift store a while back, for the astounding price of only 60cents. This tiny orange polka dot teacup has been hidden in the corner of my room for a while now, but I couldn't abandon and veil this perfect set any longer. So I turned this teacup into a candle which smells of sweet vanilla. Anyways this DIY is such an easy and affordable project and its the perfect vintage display
Things you'll need
-tea cups
-wicks
-hot glue gun
-microwavable candle wax
Directions
1) Apply a dab of glue in the middle of the bottom of the cup, then immediately stick the wick on top of the glue
2) Then follow the instructions given with the candle wax about how to melt the wax (you can add a scent to the wax once its liquid form)
3) Pour the wax into the tea cup and make sure the wick is straight up
4) Once you poured the right amount into the teacup, wait until the wax has fully dried
And there you have it, a dainty teacup candle, ENJOY!
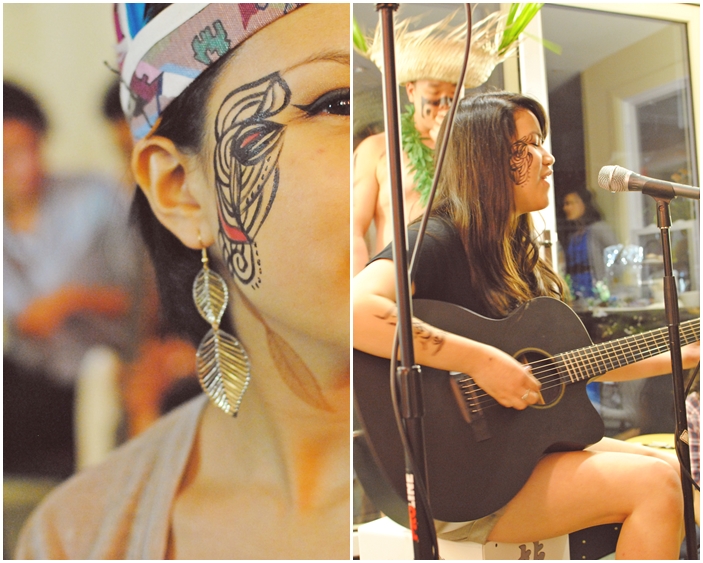
Last month I had quite the crafty spree, working with a flood of colorful feathers and plenty of suede. I constructed individual tribal head pieces which were used for a friend's themed birthday party. I know Halloween is over and done with this year but these feathered headbands are such fun pieces, that I would wear em every now and then, well the less extravagant ones of course. Unfortunately for this post I cant put together a tutorial, but i'll post some pictures of the finished pieces, and hopefully it will set a heap of creative ideas and inspiration.
I'LL leave you guys with a bunch of pictures from Laya's birthday party (L.Event). This party was just not any ordinary birthday party. It was beautifully filled with amazing performances(singing&spoken word), face/body paint, tribal wear, and just wonderful people. I'm sure it was a unforgettable event for everyone.
So October is the month when pumpkins are in season and I just about love everything pumpkin. Ive only carved pumpkins a few times through out my life and I have to admit, I terribly lack skill in carving pumpkins. They never turn out the way I picture it to be, so instead I chose to go the easy route and paint pummy pumpkins.
Heres a DIY for a quick and easy braided headband.For this headband I decided to use different types of fabric. Using different material gives the hair piece a more interesting texture and overall look. I scoured my fabric boxes for scraps and decided to use lace, lyrca fabric, and tightly woven fabric. If your decide to use different fabric, I suggest you use at least one fabric that is stretchy, like a tshirt. The strips should be at least 40" long and the width is really up to you. The thinner the strips, the thinner your headband will be. I wouldn’t go thinner than about an inch though, the strands get really hard to work with.
Gather the fabric pieces together and leave about 8" of the fabric out and secure a knot. To make it easier to braid the fabric, tape the piece onto something (taped the piece onto my bedpost). You can then begin braiding the fabrics together.
As your braiding, make sure you leave 8" of the fabric unbraided. Then tie another knot to secure the headband.
And there you have it, your very own handmade braided headband.
Not only can you use this for a headband, but also a belt, bag handles, necklace, and a bracelet wrap.